
Snel Antwoord
Snel antwoord: Begin met één heldenwinkel, kies een gedeeld verlichtings- en signsysteem, en voeg aangrenzende scènes toe met verschillende rollen. Een goede miniatuurvoedselstraat moet als één reis aanvoelen, terwijl elke winkel nog steeds uniek is. Voor een drie-winkel Rolife-display, gebruik Panda Hot Pot als het visuele anker, Hong Kong Bites Cafe als de nostalgische tussenstop, en Night Out Food Stall als de levendige bestemming voor de late avond.
Een miniatuurrestaurant is op zichzelf al charmant. Zet er echter verschillende zonder een plan bij elkaar, en het resultaat kan meer als een rij dozen aanvoelen dan als een echte straat. Het verschil is niet het aantal winkels. Het is het verhaal dat ze verbindt.
Deze gids laat zien hoe je een miniatuurvoedselstraat kunt plannen voor een bureau, plank of vitrinekast. Je kunt beginnen met één winkel, een uitgebalanceerde scène met twee winkels creëren, of een complete drie-stop avondroute bouwen. Dezelfde methode werkt ook wanneer je de straat later uitbreidt.
Waarom Werken Modulaire Miniatuurwinkels Zo Goed?
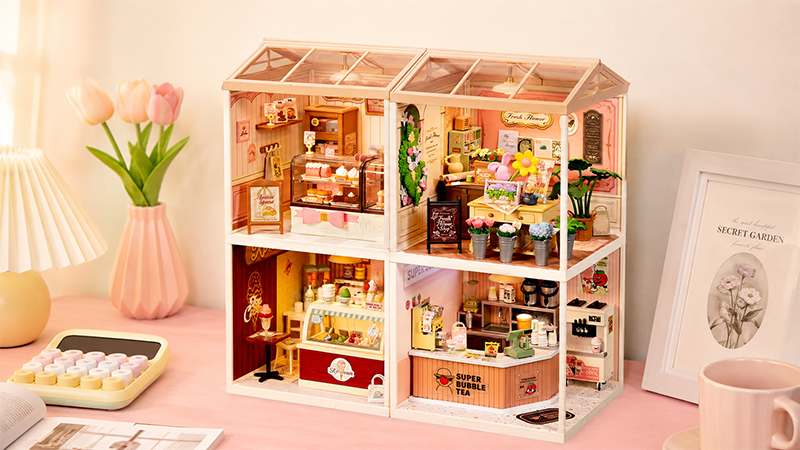
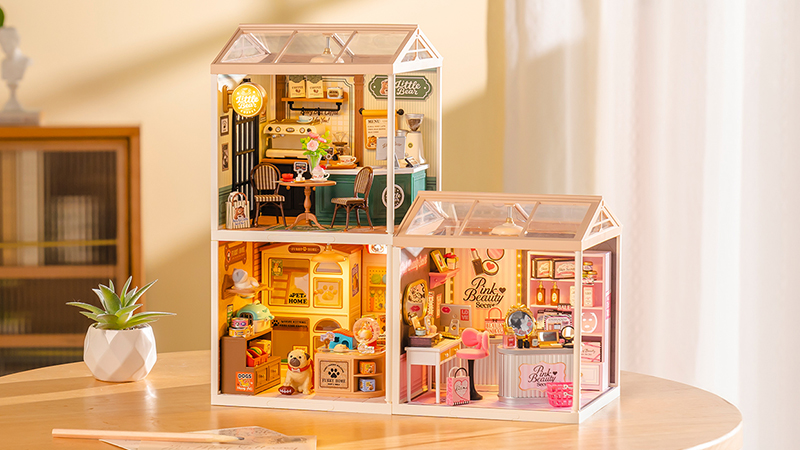
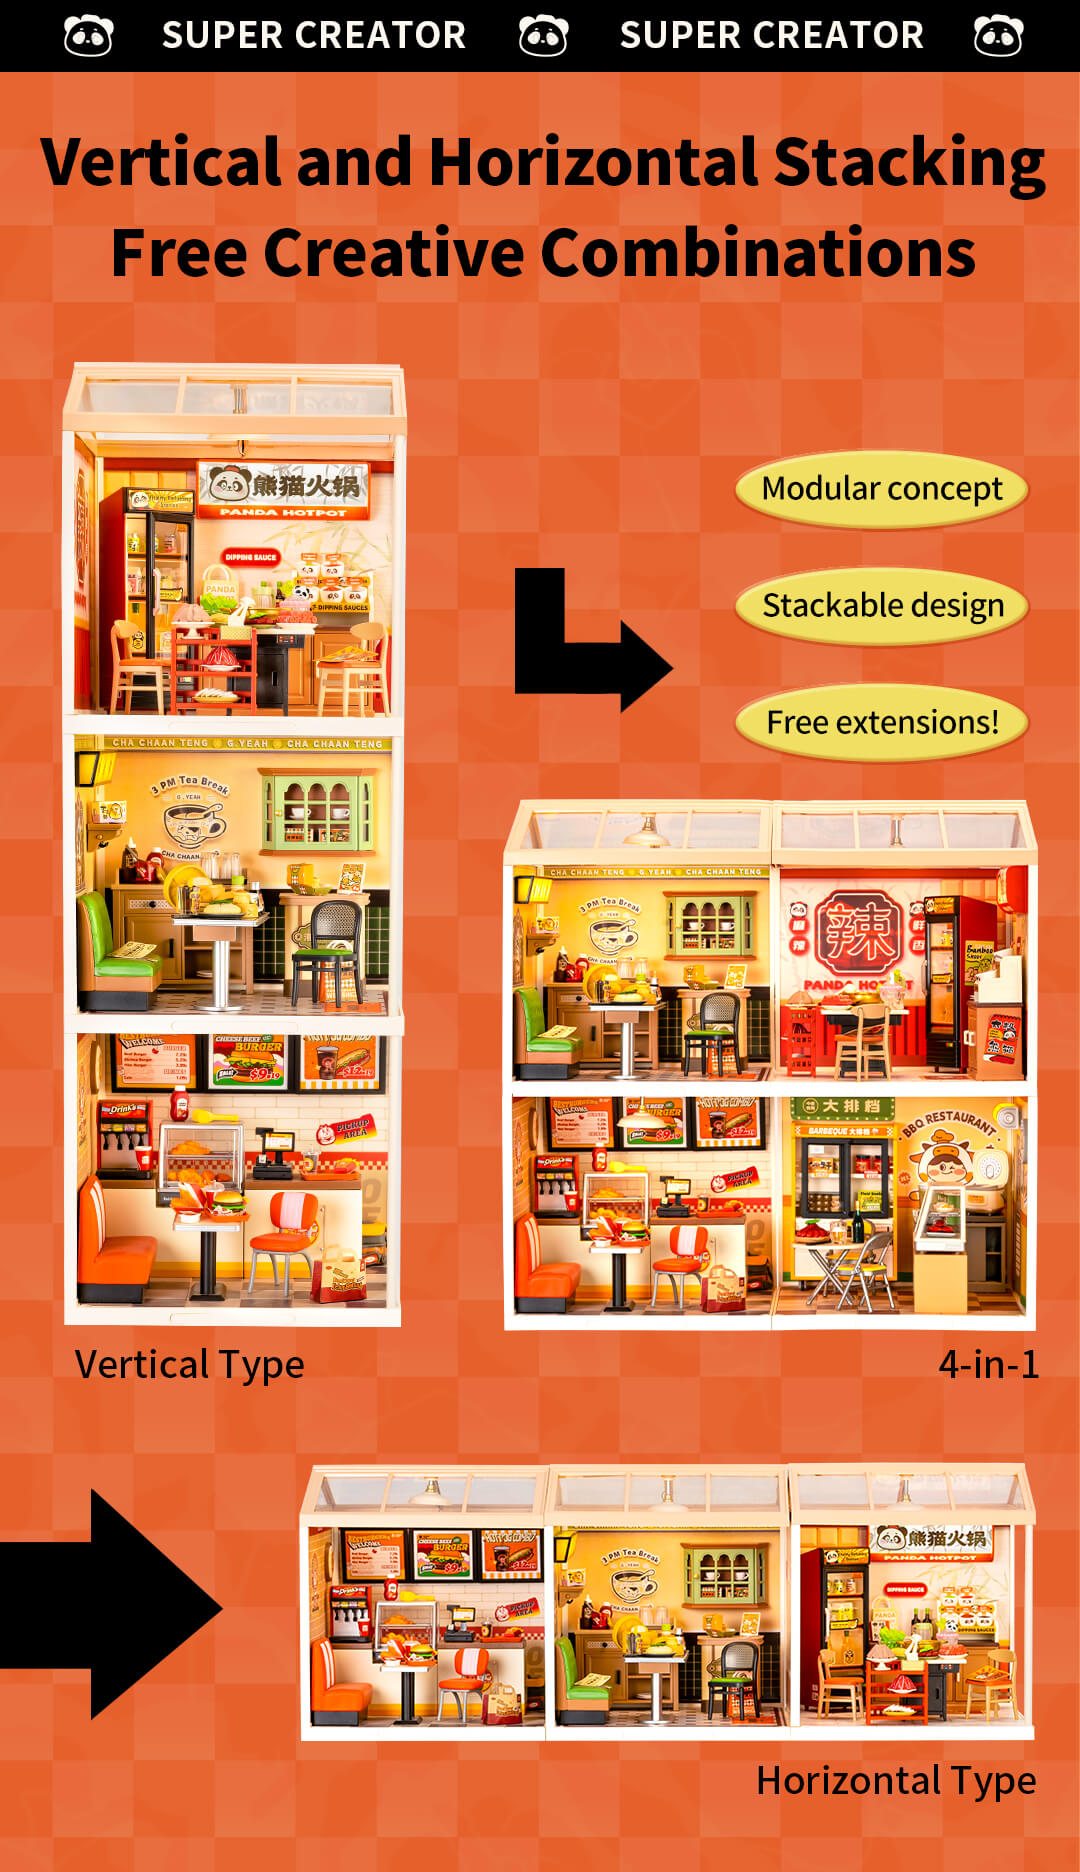
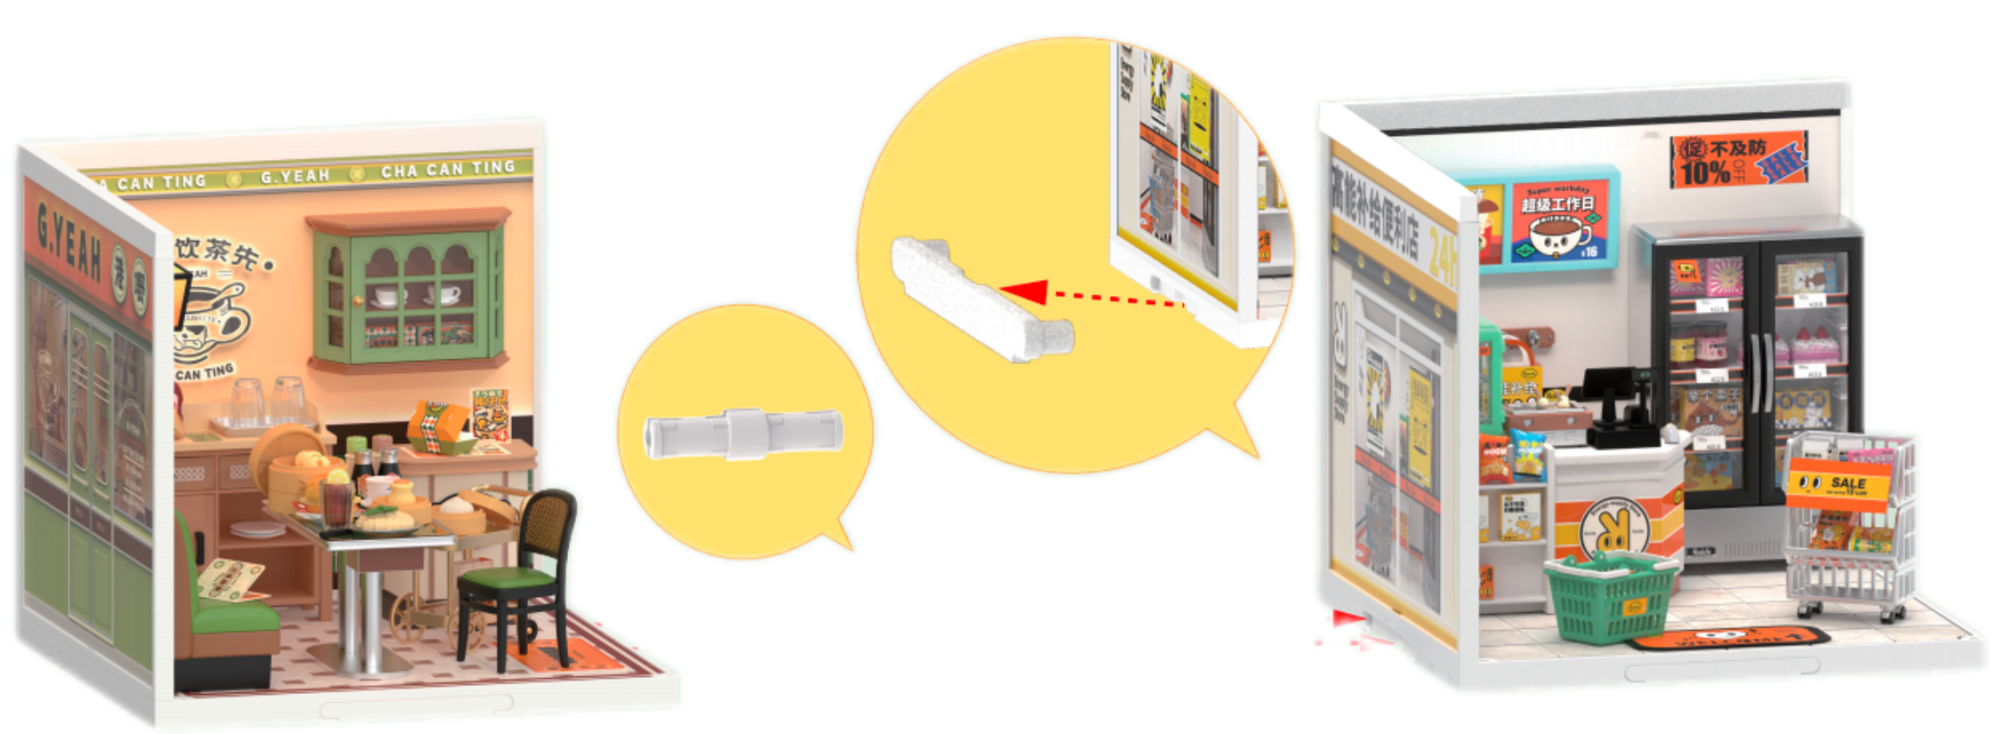
Een voedselstraat is gemakkelijker te bouwen wanneer elke winkel zowel alleen als als onderdeel van een groter systeem werkt. Rolife Super Creator kamers gebruiken een modulair formaat, zodat de eerste winkel je niet hoeft te verplichten tot een afgewerkt ontwerp op de eerste dag.
- Standalone: één kamer kan worden weergegeven als een complete scène op een bureau, plank of in een kast.
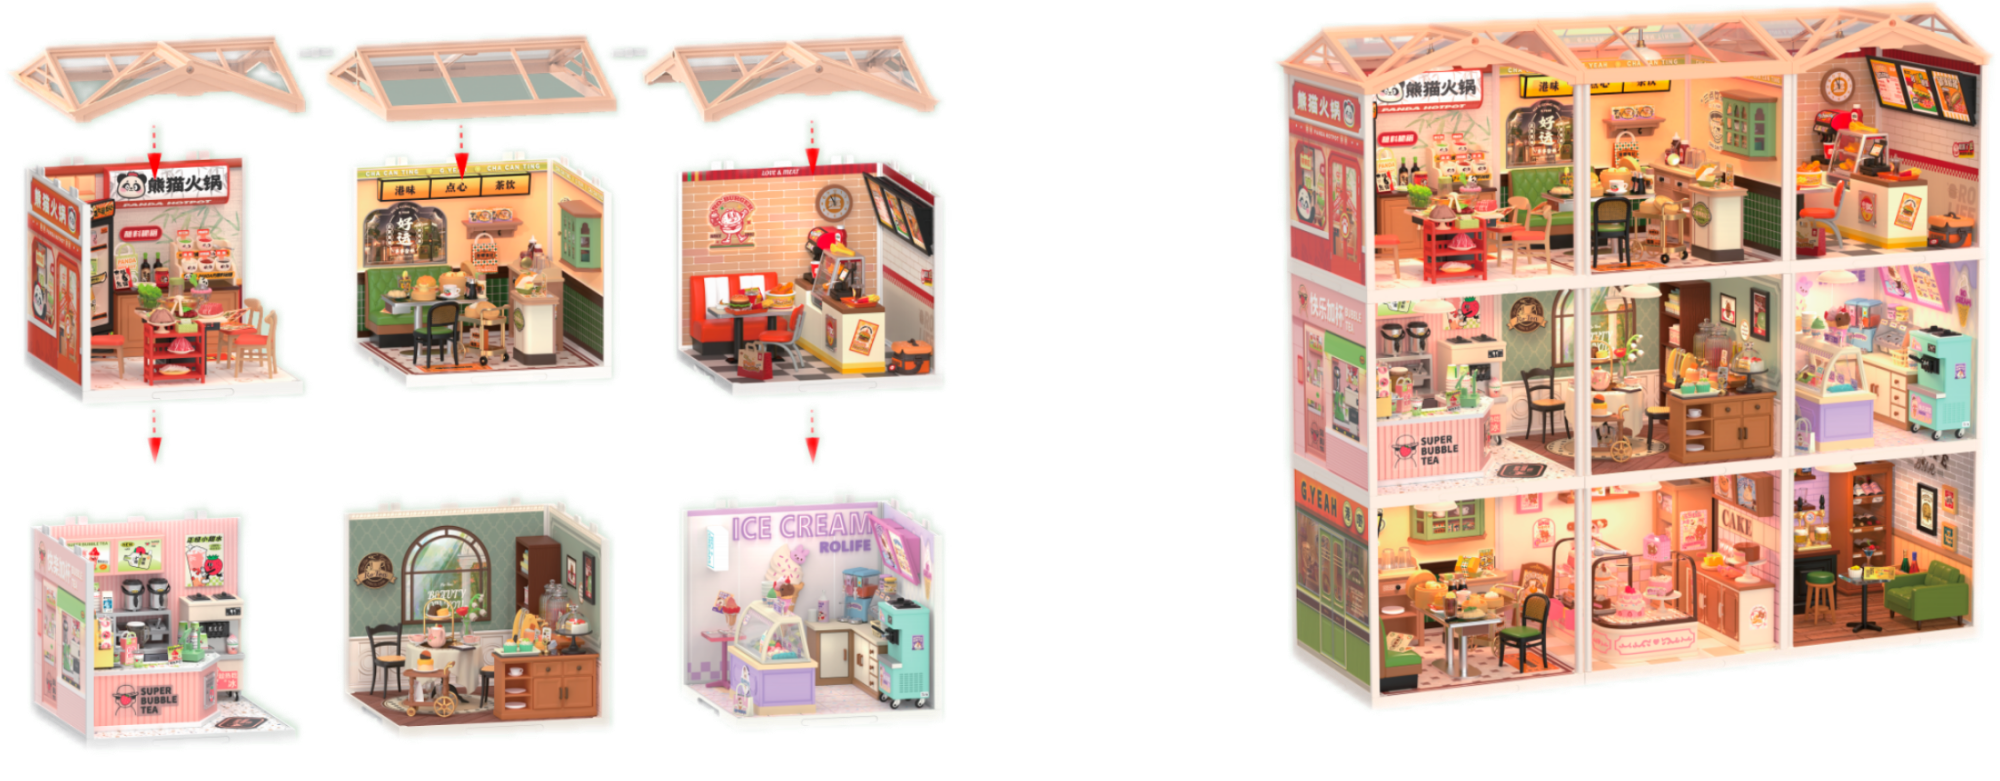
- Stapelen: compatibele kamers kunnen verticaal worden gerangschikt wanneer de plankbreedte beperkt is of wanneer je een hoger stadsblok-effect wilt.
- Uitbreidbaar: kamers kunnen horizontaal worden gekoppeld, gecombineerd in een grid, of opnieuw worden gerangschikt wanneer je een nieuwe winkel toevoegt of het verhaal verandert.
Die flexibiliteit is waarom het Super Creator systeem geschikt is voor verzamelaars die klein willen beginnen en in de loop van de tijd een miniatuurbuurt willen ontwikkelen. Een één-winkel display is geen onvolledige straat; het is het eerste voltooide hoofdstuk.
Wat Maakt Een Miniatuurvoedselstraat Voelen Als Eén Plaats?
Een geloofwaardige miniatuurstraat heeft zowel herhaling als contrast nodig. Herhaling vertelt het oog dat de winkels bij elkaar horen; contrast geeft elke stop een reden om te bestaan.
- Herhaal twee of drie visuele aanwijzingen, zoals warm licht, uitgelijnde winkelpuien, terugkerende signaalhoogtes, of dezelfde displaybasis.
- Varieer de ervaring bij elke stop: een zittende maaltijd, een snelle cafépauze, en een openlucht late-night snack creëren allemaal verschillende ritmes.
- Laat een duidelijk kijkpad achter. Het oog moet weten waar het eerst moet kijken, waar het moet pauzeren, en waar de straat eindigt.
- Bescherm één helden-detail in elke winkel. Vermijd het bedekken van de hotpot-tafel, cafébalie, of straatzijde eetruimte met extra decoraties.
Denk aan de display als een korte avond uit. Waar ontmoeten bezoekers elkaar? Waar stoppen ze tussen maaltijden? Waar wordt de nacht relaxter en socialer? Zodra die volgorde duidelijk is, worden indelingsbeslissingen veel gemakkelijker.
Welke Miniatuurvoedselwinkel Moet Je Eerst Bouwen?
De beste eerste winkel is niet automatisch de meest gedetailleerde. Het is de winkel die het beste past bij het verhaal dat je wilt dat de hele display vertelt.
Welke Voedselstraat Kit Is Het Beste Voor Jouw Stijl?
| Kit | Het beste voor | Kies het wanneer... |
|---|---|---|
| Panda Hot Pot | Sociale eetomgeving | Je wilt een gedurfde centerpiece gebouwd rond het delen van voedsel met vrienden. |
| Hong Kong Bites Cafe | Nostalgisch stadsgevoel | Je geeft de voorkeur aan retro details, caférituelen, en een rustigere scène voor dichtbij kijken. |
| Night Out Food Stall | Nacht-markt energie | Je wilt buiten dineren, casual gesprekken, en een levendige late-night finish. |
Kies Panda Hot Pot voor een gedurfde sociale centerpiece
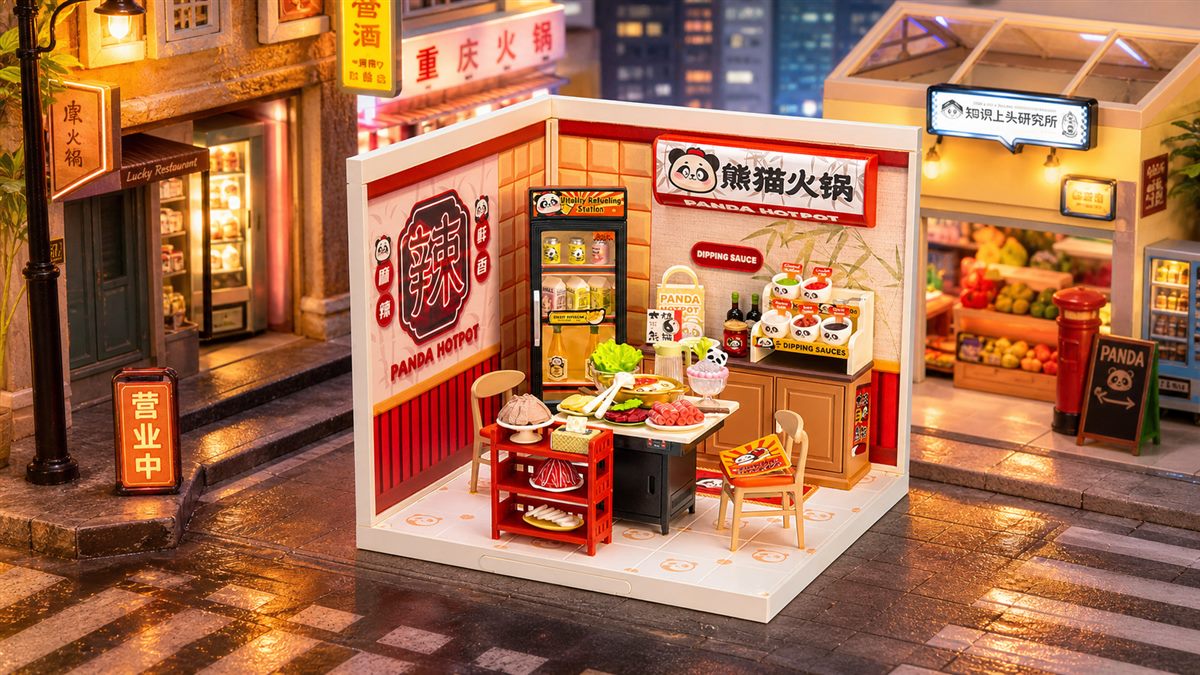
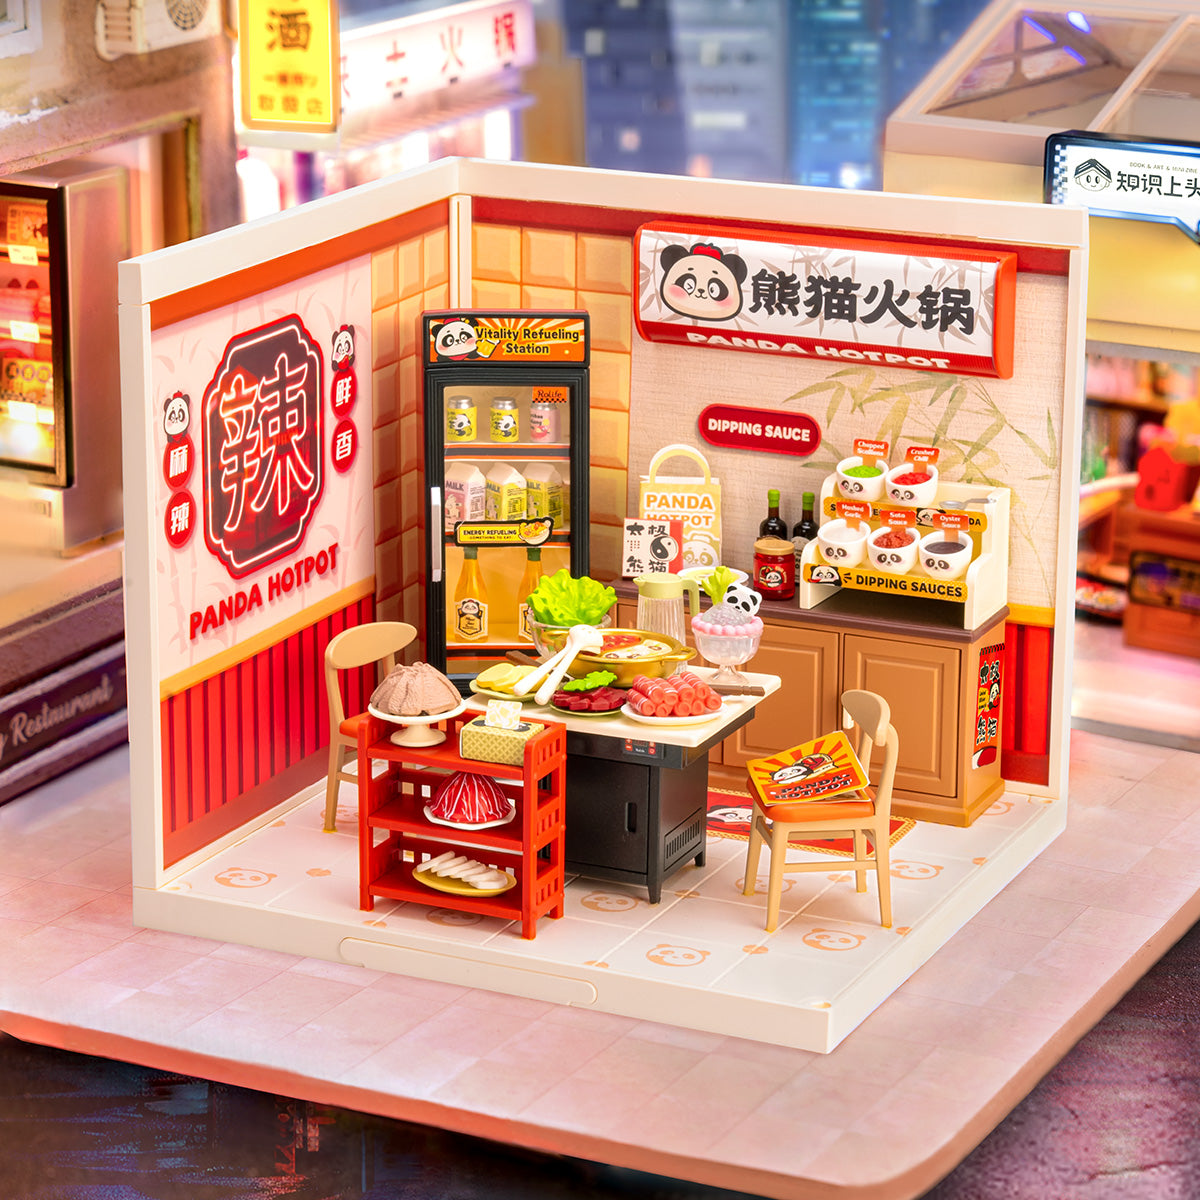
Panda Hot Pot (DW020) werkt goed als het visuele anker van een voedselstraat. De gemeenschappelijke tafel, sterke rode accenten, en panda-thema details maken het doel van de scène gemakkelijk te begrijpen van een afstand. Begin hier als je straat gaat over samenkomen, een maaltijd delen, of het vieren van voedsel met vrienden.
Kies Hong Kong Bites Cafe voor nostalgie en dagelijks stadsleven
Hong Kong Bites Cafe (DW021) is een sterke eerste keuze voor verzamelaars die worden aangetrokken door retro stadsdetails, caférituelen, en de oude Hong Kong-sfeer. De booth-zitplaatsen, betegelde oppervlakken, menu-details, en warme verlichting creëren een rustiger verhaal dat dichtbij kijken beloont.
Kies Night Out Food Stall voor een levendige nacht-markt sfeer
Night Out Food Stall (DW022) plaatst de sociale actie dicht bij de voorkant van de scène. De straatstijl tafel en krukken, barbecue-instelling, servicebalie, en late-night sfeer maken het een natuurlijke keuze voor een display gebouwd rond nacht-markt energie en casual hangouts.
Nog steeds niet zeker? Kies de winkel waarvan je het meest zichtbare detail in het midden van een foto zou willen. Dat is meestal je heldenwinkel. De volgende aankoop moet een ander soort ervaring toevoegen in plaats van dezelfde te herhalen.
Hoe Moet Je Eén, Twee, Of Drie Winkels Rangschikken?
| Displaygrootte | Aanbevolen indeling | Wat maakt het werk |
|---|---|---|
| 1 winkel | Één heldenscène, gecentreerd of iets uit het midden | Kies één duidelijk verhaal. Laat ademruimte rond de open winkelpuien zodat de miniatuur opzettelijk aanvoelt, niet verloren op een grote plank. |
| 2 winkels | Zij aan zij met de sterkere winkel iets naar voren | Koppel contrasterende ervaringen. Houd de basislijn en lichte kleur consistent zodat de winkels verbonden aanvoelen. |
| 3 winkels | Anker → connector → bestemming | Creëer een leesbare route. Gebruik de middelste winkel om kleur en sfeer te overbruggen tussen de gedurfde opening en de levendige laatste stop. |
Één-winkel indeling: maak een enkele scène compleet aanvoelen
Plaats de winkel op ooghoogte en geef het een eenvoudig visueel kader. Een donkere schaal, smalle houten plank, of duidelijke plankenzone kan de display definiëren zonder ermee te concurreren. Houd de voorkant open, positioneer het belangrijkste bord naar de kijker, en laat het interieurlicht het meeste van het verhaal vertellen.
Twee-winkel indeling: bouw contrast zonder visueel conflict
Voor twee winkels, vermijd te kiezen welke perfect gecentreerd moet zijn. Laat in plaats daarvan één winkel leiden en de andere ondersteunen. Verplaats het anker iets naar voren met een paar centimeter, of kantel de ondersteunende winkel zachtjes naar het anker toe. Het kleine verschil in diepte laat het paar aanvoelen als een hoek in plaats van een vlak productaanbod.
- Panda Hot Pot + Hong Kong Bites Cafe: het beste voor een maaltijd-naar-café verhaal met sterke kleurcontrast.
- Hong Kong Bites Cafe + Night Out Food Stall: het beste voor een geleidelijke verschuiving van nostalgisch binnen dineren naar casual straatleven.
- Panda Hot Pot + Night Out Food Stall: het beste voor de sterkste sociale en nachtelijke energie; houd de omringende decoraties ingetogen omdat beide scènes visueel actief zijn.
Drie-winkel indeling: creëer een begin, midden en einde
Een nuttige drie-winkel volgorde is Panda Hot Pot → Hong Kong Bites Cafe → Night Out Food Stall. De hotpotwinkel opent met een sterk gemeenschappelijk brandpunt. Het café vertraagt het tempo en overbrugt het kleurenpalet. De voedselkraam brengt het verhaal vervolgens naar de straat en geeft de route een ontspannen late-night finish.
Je kunt de volgorde omkeren als de display van de andere kant wordt bekeken. Wat belangrijk is, is de functie van elke scène: anker, connector, bestemming. Als één uiteinde van de plank dichter bij een muur is, plaats dan de visueel drukste winkel aan het meer open uiteinde zodat de externe details zichtbaar blijven.
Hoe Unificeer Je De Verlichting, Borden, En Kleur?
Verlichting is de snelste manier om afzonderlijke miniaturen als één straat te laten aanvoelen. Voordat je extra lampen of decoraties toevoegt, zet je de ingebouwde lichten aan en bekijk je de winkels samen vanuit je normale staande of zittende afstand.
- Kies één tijd van de dag. De voedselstraat scènes zijn vooral overtuigend als een vroege avond- tot late-night display. Vermijd het mengen van een heldere daglicht achtergrond met een donkere nacht-markt voorgrond.
- Herhaal één lichttemperatuur. Als je plankverlichting toevoegt, kies dan een warme of neutrale toon die de winkellichten ondersteunt in plaats van ze te overweldigen.
- Lijn de visuele horizon uit. Houd de winkelbases op gelijke hoogte en borden op compatibele hoogtes. Kleine verschillen zijn natuurlijk; grote ongeplande sprongen maken de straat gefragmenteerd aanvoelen.
- Gebruik kleur als een route. Laat de rode energie van Panda Hot Pot leiden naar de groene en betegelde details van Hong Kong Bites Cafe, en eindig dan met de warmere straatkraam sfeer van Night Out Food Stall.
- Beperk extra borden. Eén gedeelde straatnaam, een klein richtingbord, of een enkel menu bord is genoeg. Te veel handgemaakte borden kunnen de productdetails verbergen die al het verhaal vertellen.
Hoe Kun Je Een Geloofwaardig Klantenpad Creëren?
Een voedselstraat voelt levendig aan wanneer de kijker zich kan voorstellen dat mensen erdoorheen bewegen. Je hebt niet veel figuren of accessoires nodig. Een paar zorgvuldig geplaatste aanwijzingen kunnen een hele avond suggereren.
- Houd de belangrijkste ingangen visueel duidelijk. Plaats geen grote rekwisieten direct voor elke deur of balie.
- Kantel stoelen en tafels naar het midden van de straat zodat de scènes sociaal verbonden lijken.
- Gebruik één of twee figuren als verhaalankers: iemand die een maaltijd kiest, wacht op afhaalmaaltijden, of zich bij vrienden voegt bij de laatste stop.
- Creëer pauzes. Een open stuk tussen winkels kan fungeren als een miniatuurvoetpad en maakt gedetailleerde gebieden gemakkelijker op te merken.
- Eindig met een bestemming. Een front-facing tafel, verlichte balie, of helder bord aan het einde geeft het oog een reden om over de display te reizen.
Wat Moet Je Meten Voordat Je Meerdere Kits Koopt?
Meet de echte displayruimte voordat je planning de laatste straat. Elk van deze drie Food Street kamers is ongeveer 6.4 × 6.4 × 6 inches (16.3 × 16.3 × 15.2 cm) wanneer geassembleerd, maar je indeling heeft ook ruimte nodig voor kijkhoeken, deuren of covers, en eventuele ruimte tussen winkels.
- Breedte: zorg voor voldoende ruimte zodat alle winkelpuien zichtbaar blijven.
- Diepte: voeg ruimte toe als je wilt dat één winkel iets naar voren staat of om buiten tafels voor te plaatsen.
- Hoogte: controleer de planken boven de display voordat je gestapelde combinaties of dakaccessoires overweegt.
- Stroom en toegang: zorg ervoor dat de lichtbediening bereikbaar blijft nadat de winkels zijn geplaatst.
- Stofbescherming: beslis of de straat open blijft voor spel en herindeling of achter heldere deuren voor langdurige weergave zit.
Een papertest is nuttig: snijd drie rechthoeken uit volgens de vermelde afmetingen, plaats ze op de beoogde plank en probeer de rechte, verspringende en hoekindelingen voordat je de volledige set bestelt.
Wat is de beste uitbreidingsvolgorde?
Bouw in fasen zodat elke aankoop de straat verbetert in plaats van deze alleen maar langer te maken.
- Fase 1 — Kies de held. Koop de winkel die het dichtst bij je favoriete verhaal past: gemeenschappelijke hotpot, nostalgische café, of levendige nachtkraam.
- Fase 2 — Voeg contrast toe. Kies een tweede winkel met een ander eetritme en kleurensfeer. Test het paar voordat je meer accessoires toevoegt.
- Fase 3 — Voltooi de route. Voeg de derde winkel toe om een duidelijk begin, midden en einde te creëren.
- Fase 4 — Verfijn de omgeving. Pas alleen na het functioneren van de kernstraat zou je figuren, een gedeelde basis, seizoensgebonden details of een fotobehang moeten toevoegen.
Als je de bredere range wilt vergelijken voordat je kiest, blader dan door de Super Creator Food Street collectie. Als je een snelle introductie wilt tot de drie uitgelichte releases en hun individuele details, lees dan de Food Street nieuwe-release gids.
Veelvoorkomende Miniatuur Food Street Fouten om te Vermijden
Elke winkel als de held beschouwen
Wanneer elk bord, licht en accessoire aandacht vraagt, heeft de display geen toegangspunt. Kies één hoofdwinkel en laat de anderen de route ondersteunen.
Elke voorrand perfect uitlijnen
Een volledig vlakke rij is ruimte-efficiënt maar kan eruitzien als opslag. Een lichte verspringing of ondiepe hoek creëert diepte terwijl het modulaire systeem netjes blijft.
Decoraties toevoegen voordat de kernindeling is getest
Extra bestrating, figuren, planten en borden moeten een visueel probleem oplossen. Als de straat al duidelijk leesbaar is, voeg dan minder elementen toe en behoud negatieve ruimte.
De meest herkenbare details verbergen
Controleer de display vanuit de richting waar mensen het daadwerkelijk zullen zien. Verplaats alles wat de gemeenschappelijke hotpot tafel, café interieur, straatkraam balie of buitenzitplaatsen blokkeert.
Vergeten hoe de lichten zullen worden ingeschakeld
Een mooie opstelling wordt frustrerend als de bediening moeilijk te bereiken is. Test de toegang voordat je de display tegen een muur duwt of deze achter een cover plaatst.
Hoe moet je de Voltooide Straat Fotograferen?
Fotografeer de display zoals je deze hebt ontworpen: als een reis, niet als een catalogusrij.
- Neem één brede afbeelding die de volledige route en de relatie tussen de winkels toont.
- Maak één ooghoogte-opname vanaf de verbeelde stoep zodat de scène meeslepend aanvoelt.
- Leg één close-up per winkel vast die het held-detail behoudt.
- Voor avondopnames, verlaag het kamerlicht en tik op het scherm op het helderste bord of lamp voordat je de foto maakt.
- Neem één menselijke maat aanwijzing op—een hand, boek of bureau rand—alleen als je wilt benadrukken hoe compact de display is.
Echte Food Street Display Lessen van Rolife Community Builders
Rolife Community builders tonen aan dat een overtuigende display niet afhankelijk is van het bezitten van de grootste collectie. Hun voorbeelden wijzen op drie nuttige gewoonten: begin met één scène, let op de details die mensen zullen opmerken, en breid alleen uit wanneer de volgende kamer een nieuw verhaal toevoegt.
Rolife Community maker Prettyminnied
Creatie: Panda Hot Pot op een Rolife DIY Crafting Club meetup
Wat ze hebben veranderd: Prettyminnied richtte zich op het tot leven brengen van de indeling en kleine details terwijl ze in een gedeelde workshopomgeving bouwde.
Wat te leren: Voor een één-winkel display, voltooi de centrale eettafel en omringende voedsel-details voordat je extra props toevoegt. De scène moet duidelijk leesbaar zijn in één oogopslag en nog steeds belonen bij een nadere blik.
Bron: Rolife Community Canada meetup verhaal
Rolife Community maker Agnes_Wong1
Creatie: Panda Hot Pot als een beginner bouwer
Wat ze hebben veranderd: Agnes_Wong1 bouwde de winkel samen met andere miniatuur enthousiastelingen en beschreef de gedeelde ervaring als benaderbaar en plezierig.
Wat te leren: Een sociale voedsel scène kan ook sociaal worden gebouwd. Als je met een vriend begint, kies dan elk één winkel, houd de bases uitgelijnd en vergelijk de verlichting voordat je beslist of de kamers naast elkaar moeten staan.
Bron: Rolife Community Canada meetup verhaal
Rolife Community maker Clarice
Creatie: Een groeiende collectie die drie Super Creator kits omvatte
Wat ze hebben veranderd: Clarice begon recent, bouwde verschillende soorten miniatuur kits, en ontdekte dat ze meer mini kamers wilde toevoegen naarmate haar vertrouwen groeide.
Wat te leren: Behandel uitbreiding als een volgorde, niet als een enkele grote aankoop. Voltooi één kamer, merk op welke sfeer of functie ontbreekt, en laat die kloof de volgende winkel begeleiden.
Bron: Clarice’s Rolife Community verhaal
Veelgestelde Vragen
Kan ik een miniatuur voedselstraat bouwen met slechts één winkel?
Ja. Een één-winkel display kan nog steeds aanvoelen als onderdeel van een grotere straat wanneer het een gedefinieerde basis, duidelijke winkelpuien en een kleine hoeveelheid open stoepruimte heeft. Kies een scène met een sterk verhaal en laat ruimte om later uit te breiden.
Welke Rolife Food Street kit is het beste om mee te beginnen?
Kies Panda Hot Pot voor een gedurfde sociale centerpiece, Hong Kong Bites Cafe voor retro stadsnostalgie, of Night Out Food Stall voor een levendige late-night sfeer. De beste startkit is degene die je graag alleen zou tentoonstellen.
Wat is de beste volgorde voor de drie Food Street winkels?
Panda Hot Pot → Hong Kong Bites Cafe → Night Out Food Stall creëert een duidelijke maaltijd-naar-café-naar-nacht-markt reis. Je kunt de volgorde omkeren om aan te passen aan de richting van waaruit je plank wordt bekeken.
Moeten de winkels in een rechte lijn of een hoek worden gerangschikt?
Gebruik een rechte lijn voor smalle planken en een ondiepe hoek of verspringende indeling wanneer je meer diepte hebt. Een lichte offset creëert meestal een natuurlijker straatbeeld dan een perfect vlakke rij.
Hoe maak ik afzonderlijke miniatuurwinkels cohesief?
Herhaal een kleine set visuele aanwijzingen: één tijd van de dag, compatibele lichttemperatuur, uitgelijnde bases, een gedeeld displayoppervlak, en ingetogen signage. Behoud dan een ander held-detail in elke winkel.
Heb ik extra accessoires nodig om de display te voltooien?
Nee. Bouw en verlicht eerst de kernwinkels. Voeg figuren, borden of seizoensgebonden props alleen toe als ze het verhaal versterken of helpen om lege gebieden tussen scènes te verbinden.
Bouw de Straat die je Zou Willen Bezoeken
De meest memorabele miniatuur voedselstraat is niet noodzakelijk de grootste. Het is degene met een duidelijke sfeer en een route die je je kunt voorstellen te volgen: ontmoet vrienden voor hotpot, pauzeer voor melk thee en een snack, en eindig de nacht rond een straat-tafel.
Begin met één winkel die je leuk vindt, geef de tweede winkel een andere rol, en laat de derde de avond compleet maken. Verken de Rolife Super Creator Food Street collectie en bouw je miniatuurbuurt één stop tegelijk.