Have you ever wished you could build a bouquet using exactly the flowers you love?
Maybe you'd combine pink tulips with soft carnations, add a little blue for contrast, or create an arrangement that matches your favorite corner at home.
With DIY wooden flowers, you can explore those ideas one bloom at a time.
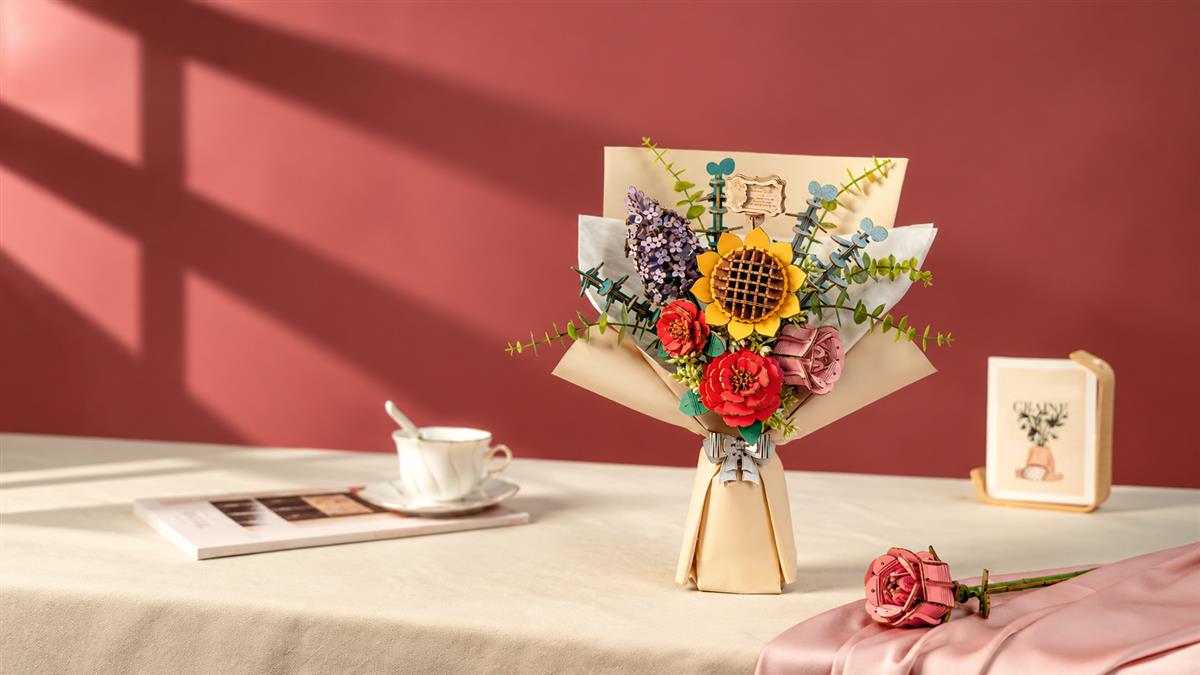
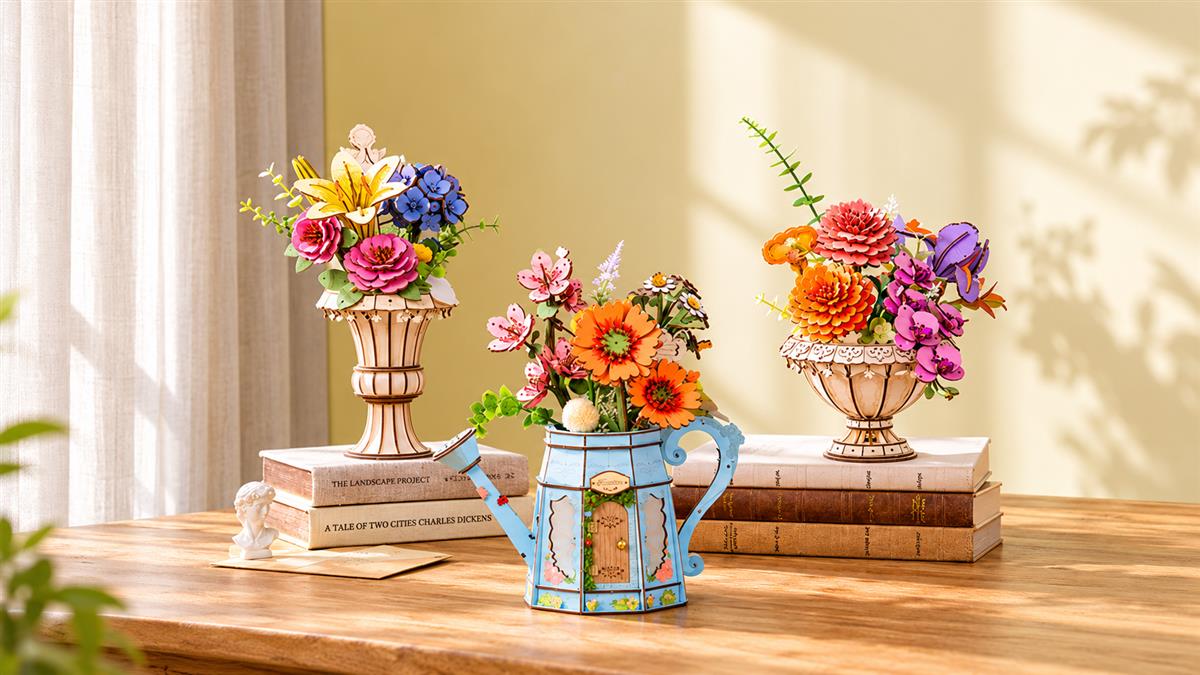
Rowood's collection includes individual wooden flower kits in different colors and shapes, along with complete arrangements such as the Wooden Flower Bouquet and Wooden Flower Basket.
Whether you're starting a collection of single flowers or building a larger floral kit, there's plenty of room to experiment with colors, display ideas, and personal touches.
Here's how to create an arrangement that feels like your own, with practical inspiration from makers who have already completed their wooden flower projects.
Step 1: Decide What Kind of Bouquet You Want to Make
Before choosing your flowers, think about how you'd like to display them.
There are three main approaches.
Build a Complete Wooden Flower Bouquet Kit
If you want a coordinated arrangement without choosing every flower individually, start with a complete design such as the Rowood Wooden Flower Bouquet TW01H.
The flowers and overall presentation are already planned as part of the kit, allowing you to focus on the building process.
This is a good option if you enjoy following a structured project and want a finished bouquet with a consistent design.
Build a Wooden Flower Basket
For a decorative centerpiece, consider the Rowood Wooden Flower Basket TW03H.
This kit includes a basket-style display and individual floral components that are arranged as part of the completed design.
Compared with a wrapped bouquet, the basket provides a different type of crafting and display experience.
Create a Collection From Individual Flowers

If you enjoy choosing your own colors, start with single wooden flower kits.
You might begin with a Pink Carnation, add an Orange Tulip, and eventually build a collection that includes lilies, lilacs, hydrangeas, and other blooms.
These flowers can be displayed together as a coordinated collection, even when each kit uses its own base or display structure.
Before combining individual flowers into one vase, check the construction and dimensions of each finished kit. Not all single-flower models are designed to connect or stand securely in a shared container.
Step 2: Choose Your Flowers and Color Palette
A little planning makes it easier to create an arrangement that looks balanced.
You don't need to know anything about professional flower arranging. Start with a color combination you enjoy, then choose flowers with different shapes and visual textures.
Here are three palettes to inspire you.
Soft and Romantic: Pink, Lilac, and Lavender

Try:
- Rowood Pink Carnation
- Rowood Pink Tulip
- Rowood Lilac
Pink carnations bring a delicate, layered appearance. Tulips offer a smoother, simpler silhouette, while lilac adds a different floral texture.
Together, these colors create a soft, romantic look.
Best for: Bedrooms, reading corners, and thoughtful handmade gifts.
Bright and Cheerful: Orange, Pink, and White
Try:
- Rowood Orange Tulip
- Rowood Pink Carnation
- Rowood Chamomile
Orange brings warmth and energy, while pink adds softness.
Chamomile introduces smaller, lighter-looking blossoms that can balance stronger colors.
Best for: Creative workspaces, cheerful home accents, and colorful gifts.
Cool and Elegant: Blue, Purple, and Pink
Try:
- Rowood Blue Hydrangea
- Rowood Purple Moth Orchid
- Rowood Pink Lily
A blue hydrangea creates a fuller floral shape, while the orchid and lily add different petal forms.
The combination is colorful without relying on particularly bright tones.
Best for: Bookshelves, modern interiors, and people who love blue and purple flowers.
These are visual pairing ideas. You can arrange compatible finished flowers together or display their individual kits as a coordinated group.
Step 3: Build One Flower at a Time
Once you've chosen your flowers, it's time to start building.
Prepare a clean workspace with good lighting and enough room to organize the parts.
Before assembly, read the instructions for your specific kit. Check whether any additional tools or materials are required, and identify delicate pieces that may need extra care.
A simple approach is to finish one flower before opening another kit.
This helps keep small pieces organized and allows you to enjoy each completed bloom before moving on.
Don't Rush the Delicate Details
Wooden flower kits can vary considerably in complexity.
Some individual flowers make enjoyable shorter projects. Larger arrangements may involve multiple blooms, small leaves, decorative elements, and packaging or display structures.
In the Robotime community, Jill_Francisco shared her experience building the Rowood Wooden Flower Basket.
She initially expected the remaining flowers and decorative greenery to be relatively straightforward.
However, the red rose took longer than she anticipated, and attaching the small eucalyptus leaves proved particularly challenging.
After realizing she wasn't going to finish within the estimated time, she stopped checking the clock and focused on enjoying the project.
Read Jill's detailed wooden flower basket build.
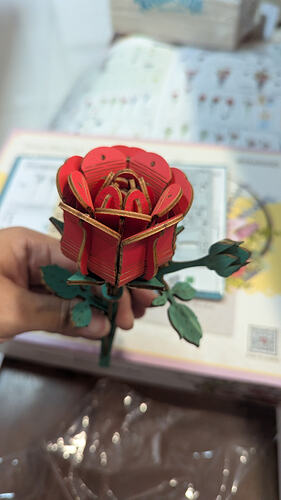
It's a useful reminder that an estimated assembly time is only a guide. Your pace, experience, and attention to detail all affect how long a project takes.
Build at Your Own Pace
For a larger arrangement, there's no need to complete everything in one sitting.
You can assemble a few flowers one evening and finish the rest over the weekend.
If you're building several individual kits, treating each flower as its own small project can make the overall experience more enjoyable.
Step 4: Arrange the Flowers by Height, Shape, and Color
Once the flowers are finished, consider how they look together.
Whether you're using a compatible vase, a kit's original display base, or a collection of individually standing flowers, the same visual principles apply.
Start With a Focal Flower
Choose the bloom you want people to notice first.
It might be the boldest color, the tallest flower, or one with an especially distinctive shape.
A fuller hydrangea or a colorful lily can create an interesting focal point.
Then arrange the other flowers around it.
Vary the Heights
Try placing taller flowers toward the back and shorter ones toward the front.
When displaying individual kits on a shelf, you can create a similar effect by positioning larger pieces behind smaller ones.
Avoid hiding the flowers you spent time building.
Mix Different Flower Shapes
An arrangement becomes more interesting when the flowers aren't all identical.
A tulip's smooth shape contrasts with the layered look of a carnation. A hydrangea introduces a fuller blossom, while a lily or orchid creates a more distinctive silhouette.
You don't need many different flowers—just enough variety to make the display feel intentional.
Leave Space Between Blooms
It's tempting to pack every flower closely together.
But some breathing room allows the individual shapes to stand out.
Step back occasionally to see how the arrangement looks from a distance.
Small adjustments in spacing can make a surprising difference.
Step 5: Learn From a Real Wooden Flower Basket Build
The arranging stage is often where a collection of individual pieces finally begins to feel like a complete floral display.
Jill_Francisco's Wooden Flower Basket provides a useful example.
After completing the flowers and greenery, she moved on to the arrangement base.
She noted that it included additional slots, allowing her to experiment with the positioning of flowers and greenery.
She then completed the basket structure and chose the blue-gray option for its outer presentation.
The finished result was a colorful floral display that she thought would make a lovely gift, especially for Mother's Day.
See the complete flower basket and assembly photos.
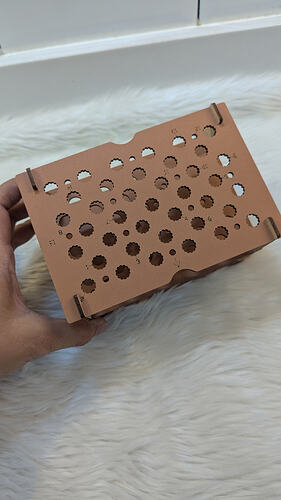
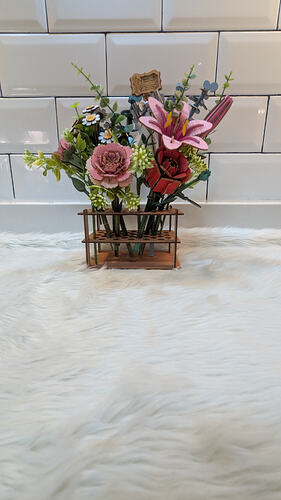
The lesson here is simple: when a kit provides adjustable positioning options, take a little time to try different compositions before settling on the final arrangement.
Not every Rowood product uses the same display structure, so follow the specific instructions for your model.
Step 6: Choose a Display That Fits Your Style
The flowers may be finished, but styling them is another opportunity to be creative.
A Traditional Vase
A suitable vase can give a finished bouquet the familiar look of fresh-cut flowers.
One Robotime community member, Grey74, completed a Rowood Wooden Flower Basket but preferred how the flowers looked in a conventional vase.
After finishing the original display structure, Grey74 moved the flowers into a different container and placed the arrangement on a living-room end table.
See Grey74's alternative flower display.
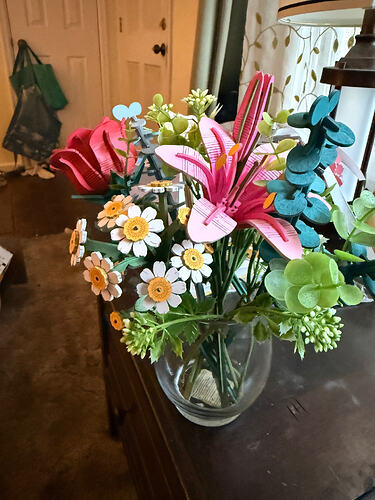
This was a personal display choice. If you're considering something similar, check that the flowers can be removed safely and that the new container provides enough support.
A Bookshelf Flower Collection
A bookshelf is a lovely place to display individual wooden flowers.
You can group them by color, combine different heights, or place them beside books, photographs, and other handmade creations.
Community member Jill_Francisco shared a growing collection of wooden flowers and described how satisfying she found the smaller projects.
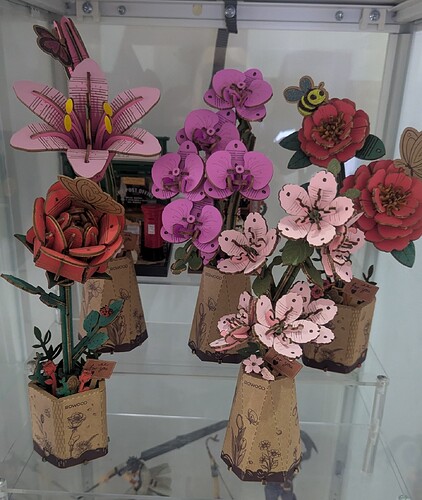
It's a great example of how individual flower kits can become an ongoing creative hobby rather than a single project.
A Desk or Side-Table Arrangement
For smaller spaces, select just a few flowers.
A simple arrangement can brighten a desk or side table without making the space feel crowded.
Try choosing one main color and one complementary accent, then let the flowers become the focal point.
Step 7: Add a Personal Touch
Once you're comfortable with the original design, you may want to experiment with custom details.
Some makers enjoy painting exposed wooden edges or adding decorative accents.
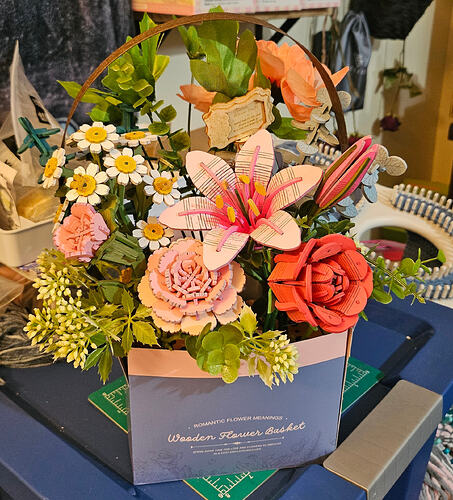
Robotime community member Smith42 shared a Wooden Flower Basket with painted edges and additional artificial flowers placed behind the original arrangement.
The extra flowers created a fuller look, while the painted edges gave the project a more customized finish.
Explore Smith42's flower basket customization.
If you want to try similar changes, remember that these are optional personal modifications.
Use materials suitable for the kit, test paint on an inconspicuous area, and avoid changing structural parts that hold the model together.
You can also personalize your display without modifying the kit at all.
A decorative tray, a carefully chosen background, or a handwritten gift note may be all you need.
Step 8: Keep Your Wooden Flowers Looking Their Best
Once your bouquet or collection is complete, a little care helps it stay beautiful.
Dust the flowers gently using a soft, dry brush.
Avoid soaking the wooden pieces in water, and keep them away from excessive moisture.
Choose a stable display location where delicate petals and stems are unlikely to be knocked or bent.
For longer-lasting colors, avoid placing the arrangement in strong direct sunlight for extended periods.
And if you're giving the flowers as a finished gift, protect the delicate parts during transportation.
Make It Your Own, One Bloom at a Time
There's no single right way to enjoy wooden flowers.
You might build a complete bouquet and follow its original design. You might arrange a flower basket and experiment with the positioning of its blooms. Or you might start with one individual flower and gradually build an entire collection.
The finished result doesn't have to be perfect or look exactly like the product photography.
The pleasure comes from making something with your own hands—and finding a way to make it feel like yours.
Explore the Rowood Wooden Flowers Collection to choose your next flower project.
For gift ideas, read Wooden Flower Bouquets: A Thoughtful Gift That Lasts.
And if you're planning a handmade holiday present, discover DIY Wooden Flower Gifts for Christmas.